


The Domain Listing feature allows you to display multiple domains for sale in a structured layout such as a Grid or List. This is useful when you want to showcase several domains on a single page instead of using individual landing pages.
You can create and manage domain listings from the WordPress dashboard.
Accessing Domain Listing #
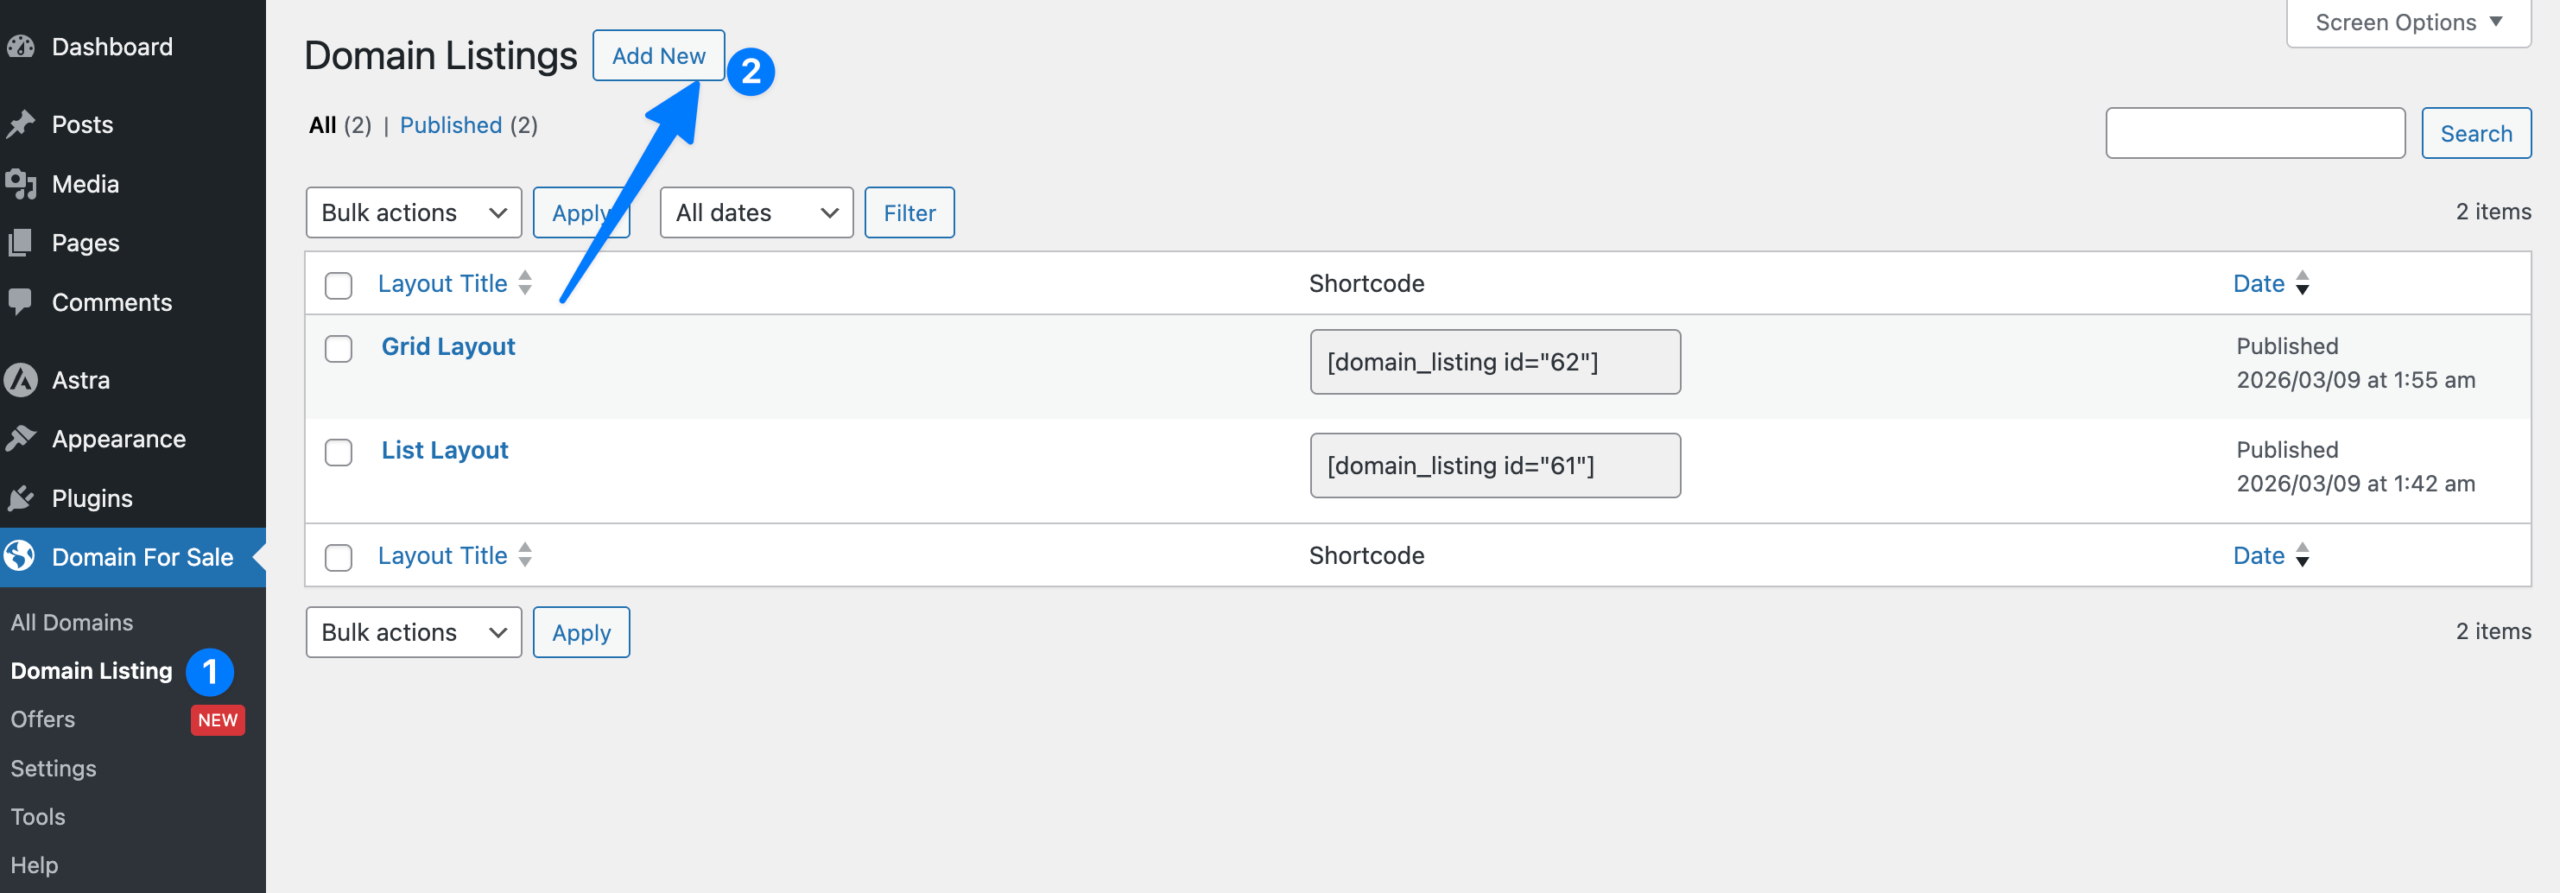
1. Domain Listing #
Navigate to:
Domain For Sale → Domain Listing
This section shows all previously created domain listing layouts.
Each listing generates a shortcode that can be inserted into posts, pages, or widgets.
2. Add New #
Click the Add New button to create a new domain listing layout.
Creating a Domain Listing #
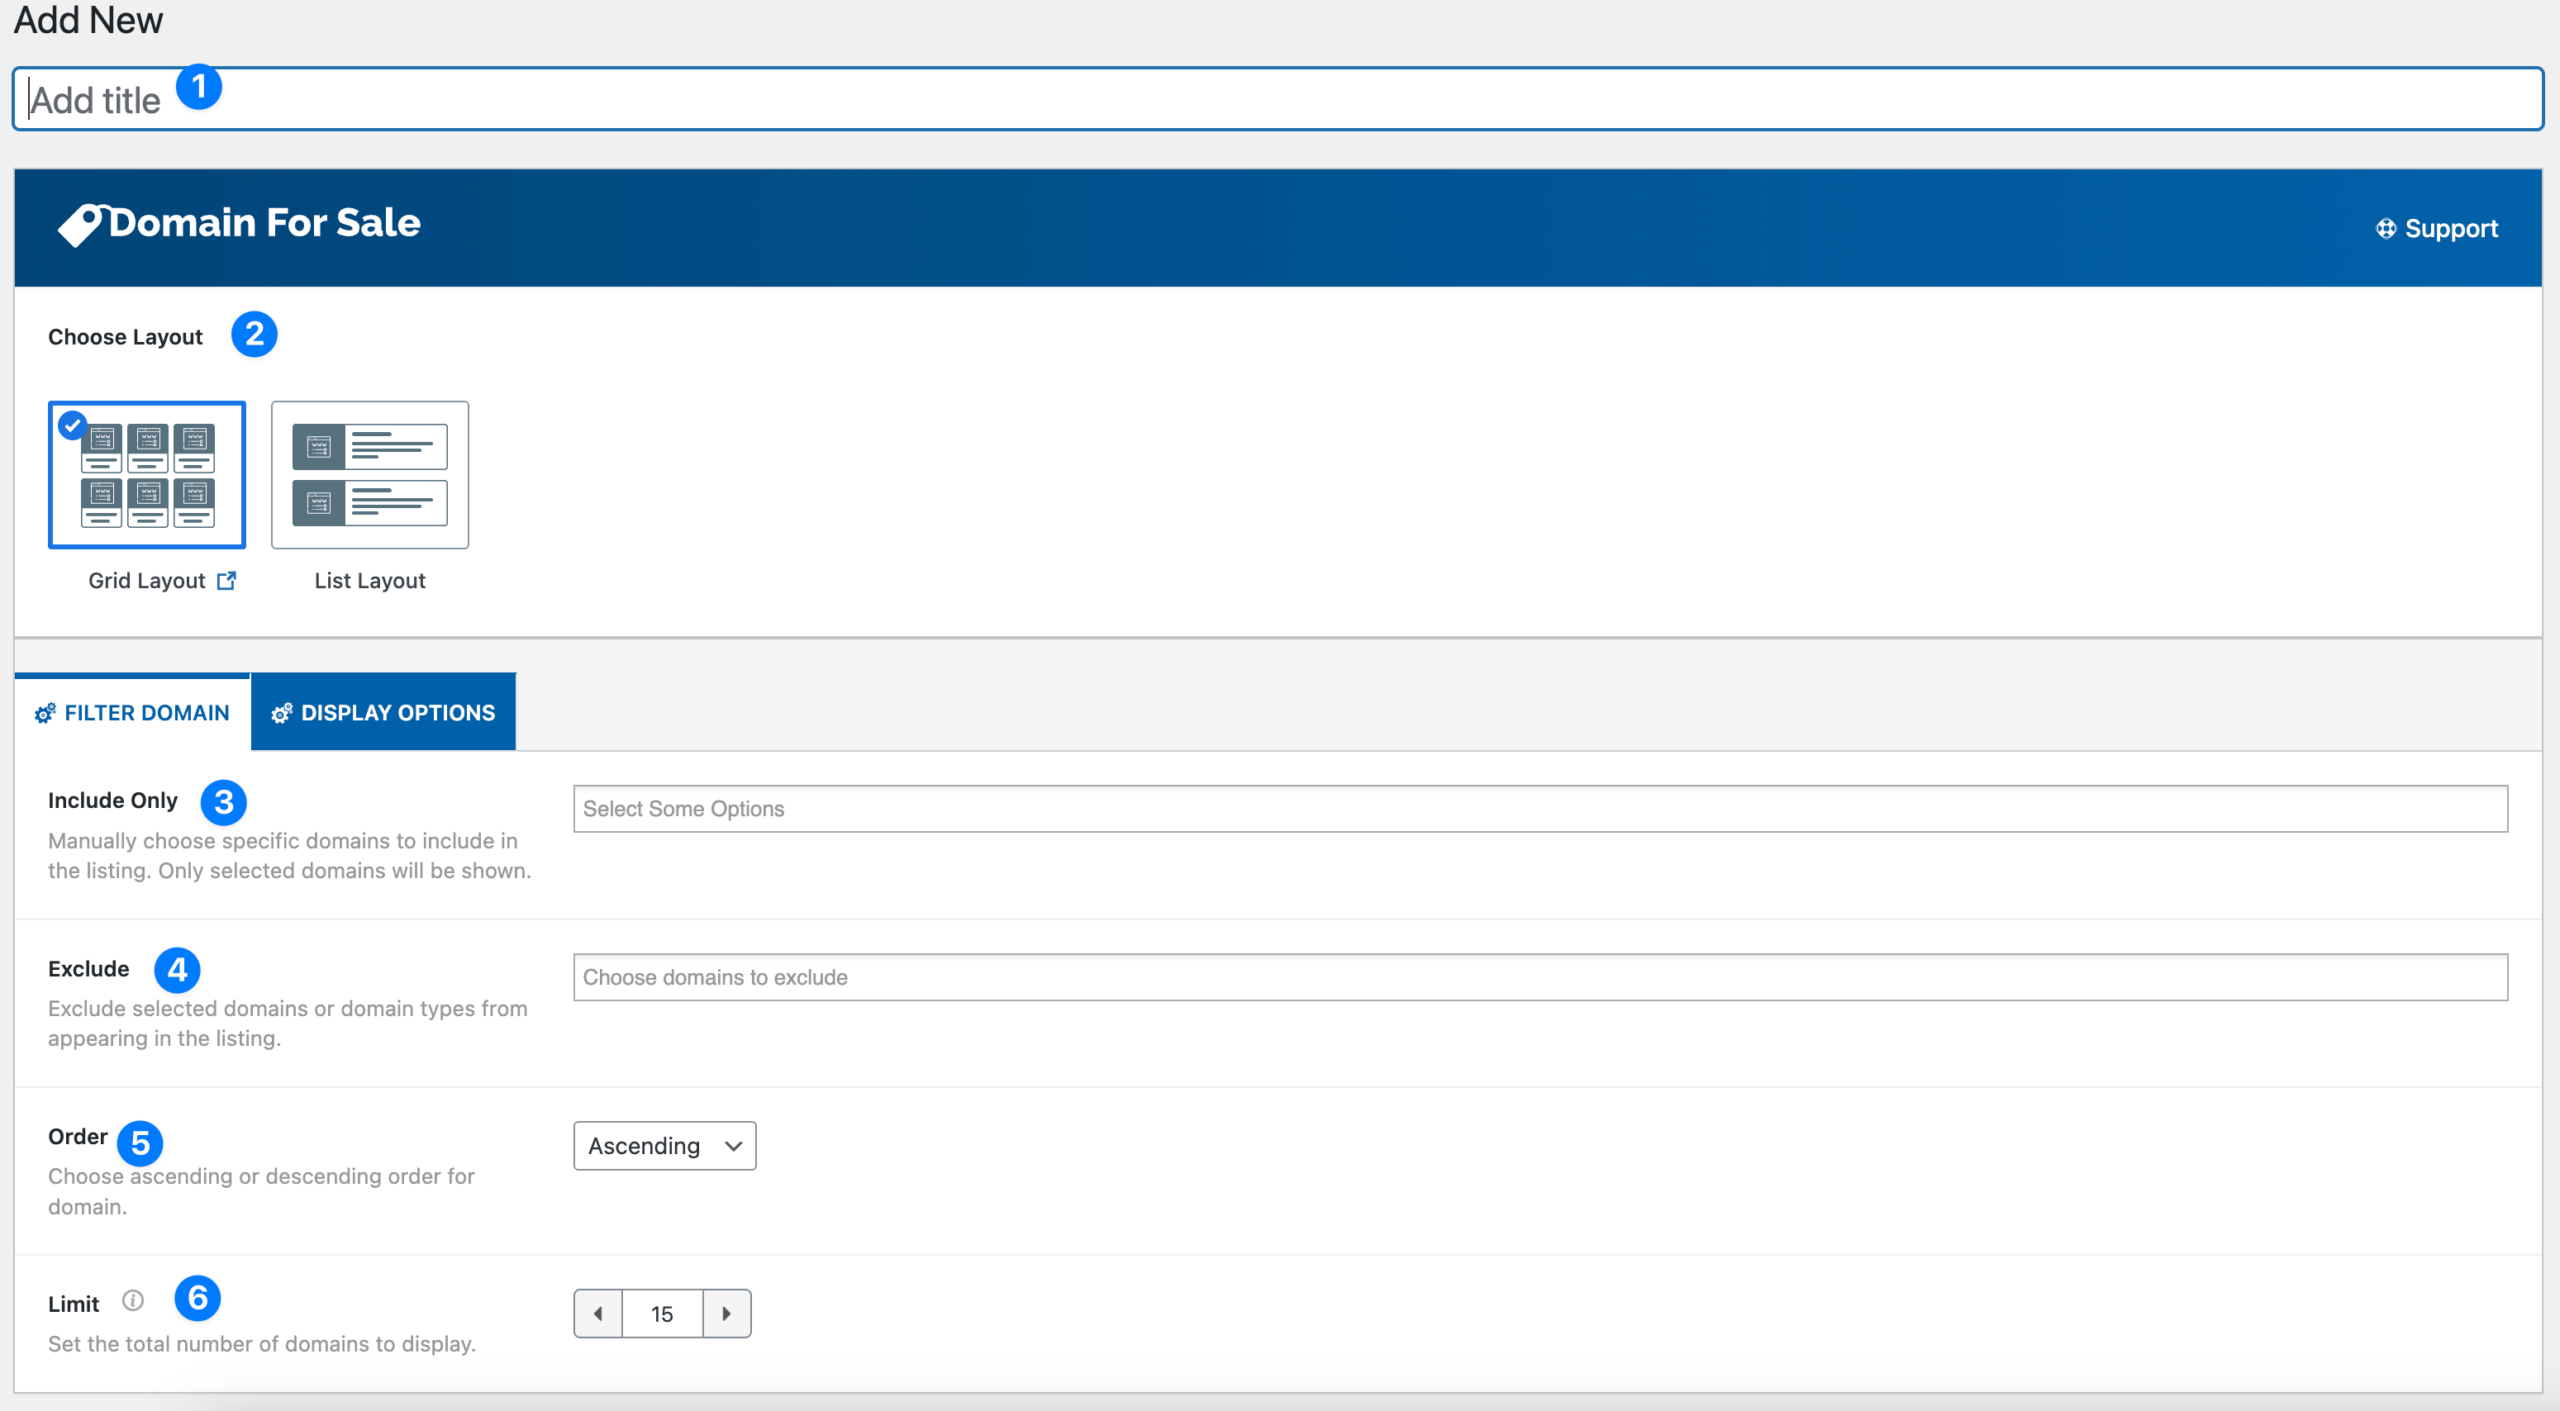
After clicking Add New, you will see the Domain Listing builder where you can configure how domains appear on your website.
1. Layout Title #
Enter a title for your listing layout.
Example:
- Grid Layout
- List Layout
This title is used only for internal management.
2. Choose Layout #
Select how the domains will be displayed on your website.
Available layouts:
Grid Layout
- Displays domains in a grid format.
- Ideal for showcasing many domains visually.
List Layout
- Displays domains in a vertical list.
- Best for detailed domain information.
Filter Domain #
The Filter Domain tab allows you to control which domains appear in the listing.
3. Include Only #
Select specific domains that should appear in the listing.
Only the selected domains will be displayed.
Use this option when:
- Creating a curated domain portfolio
- Showing featured domains only
4. Exclude #
Choose domains that should not appear in the listing.
Useful when:
- You want to hide certain domains
- You want to remove sold domains from the list
5. Order #
Choose the order in which domains appear.
Available options:
- Ascending
- Descending
This controls how the domains are sorted.
6. Limit #
Set the maximum number of domains to display in the listing.
Example:
15
Only the specified number of domains will be shown.
Display Options #
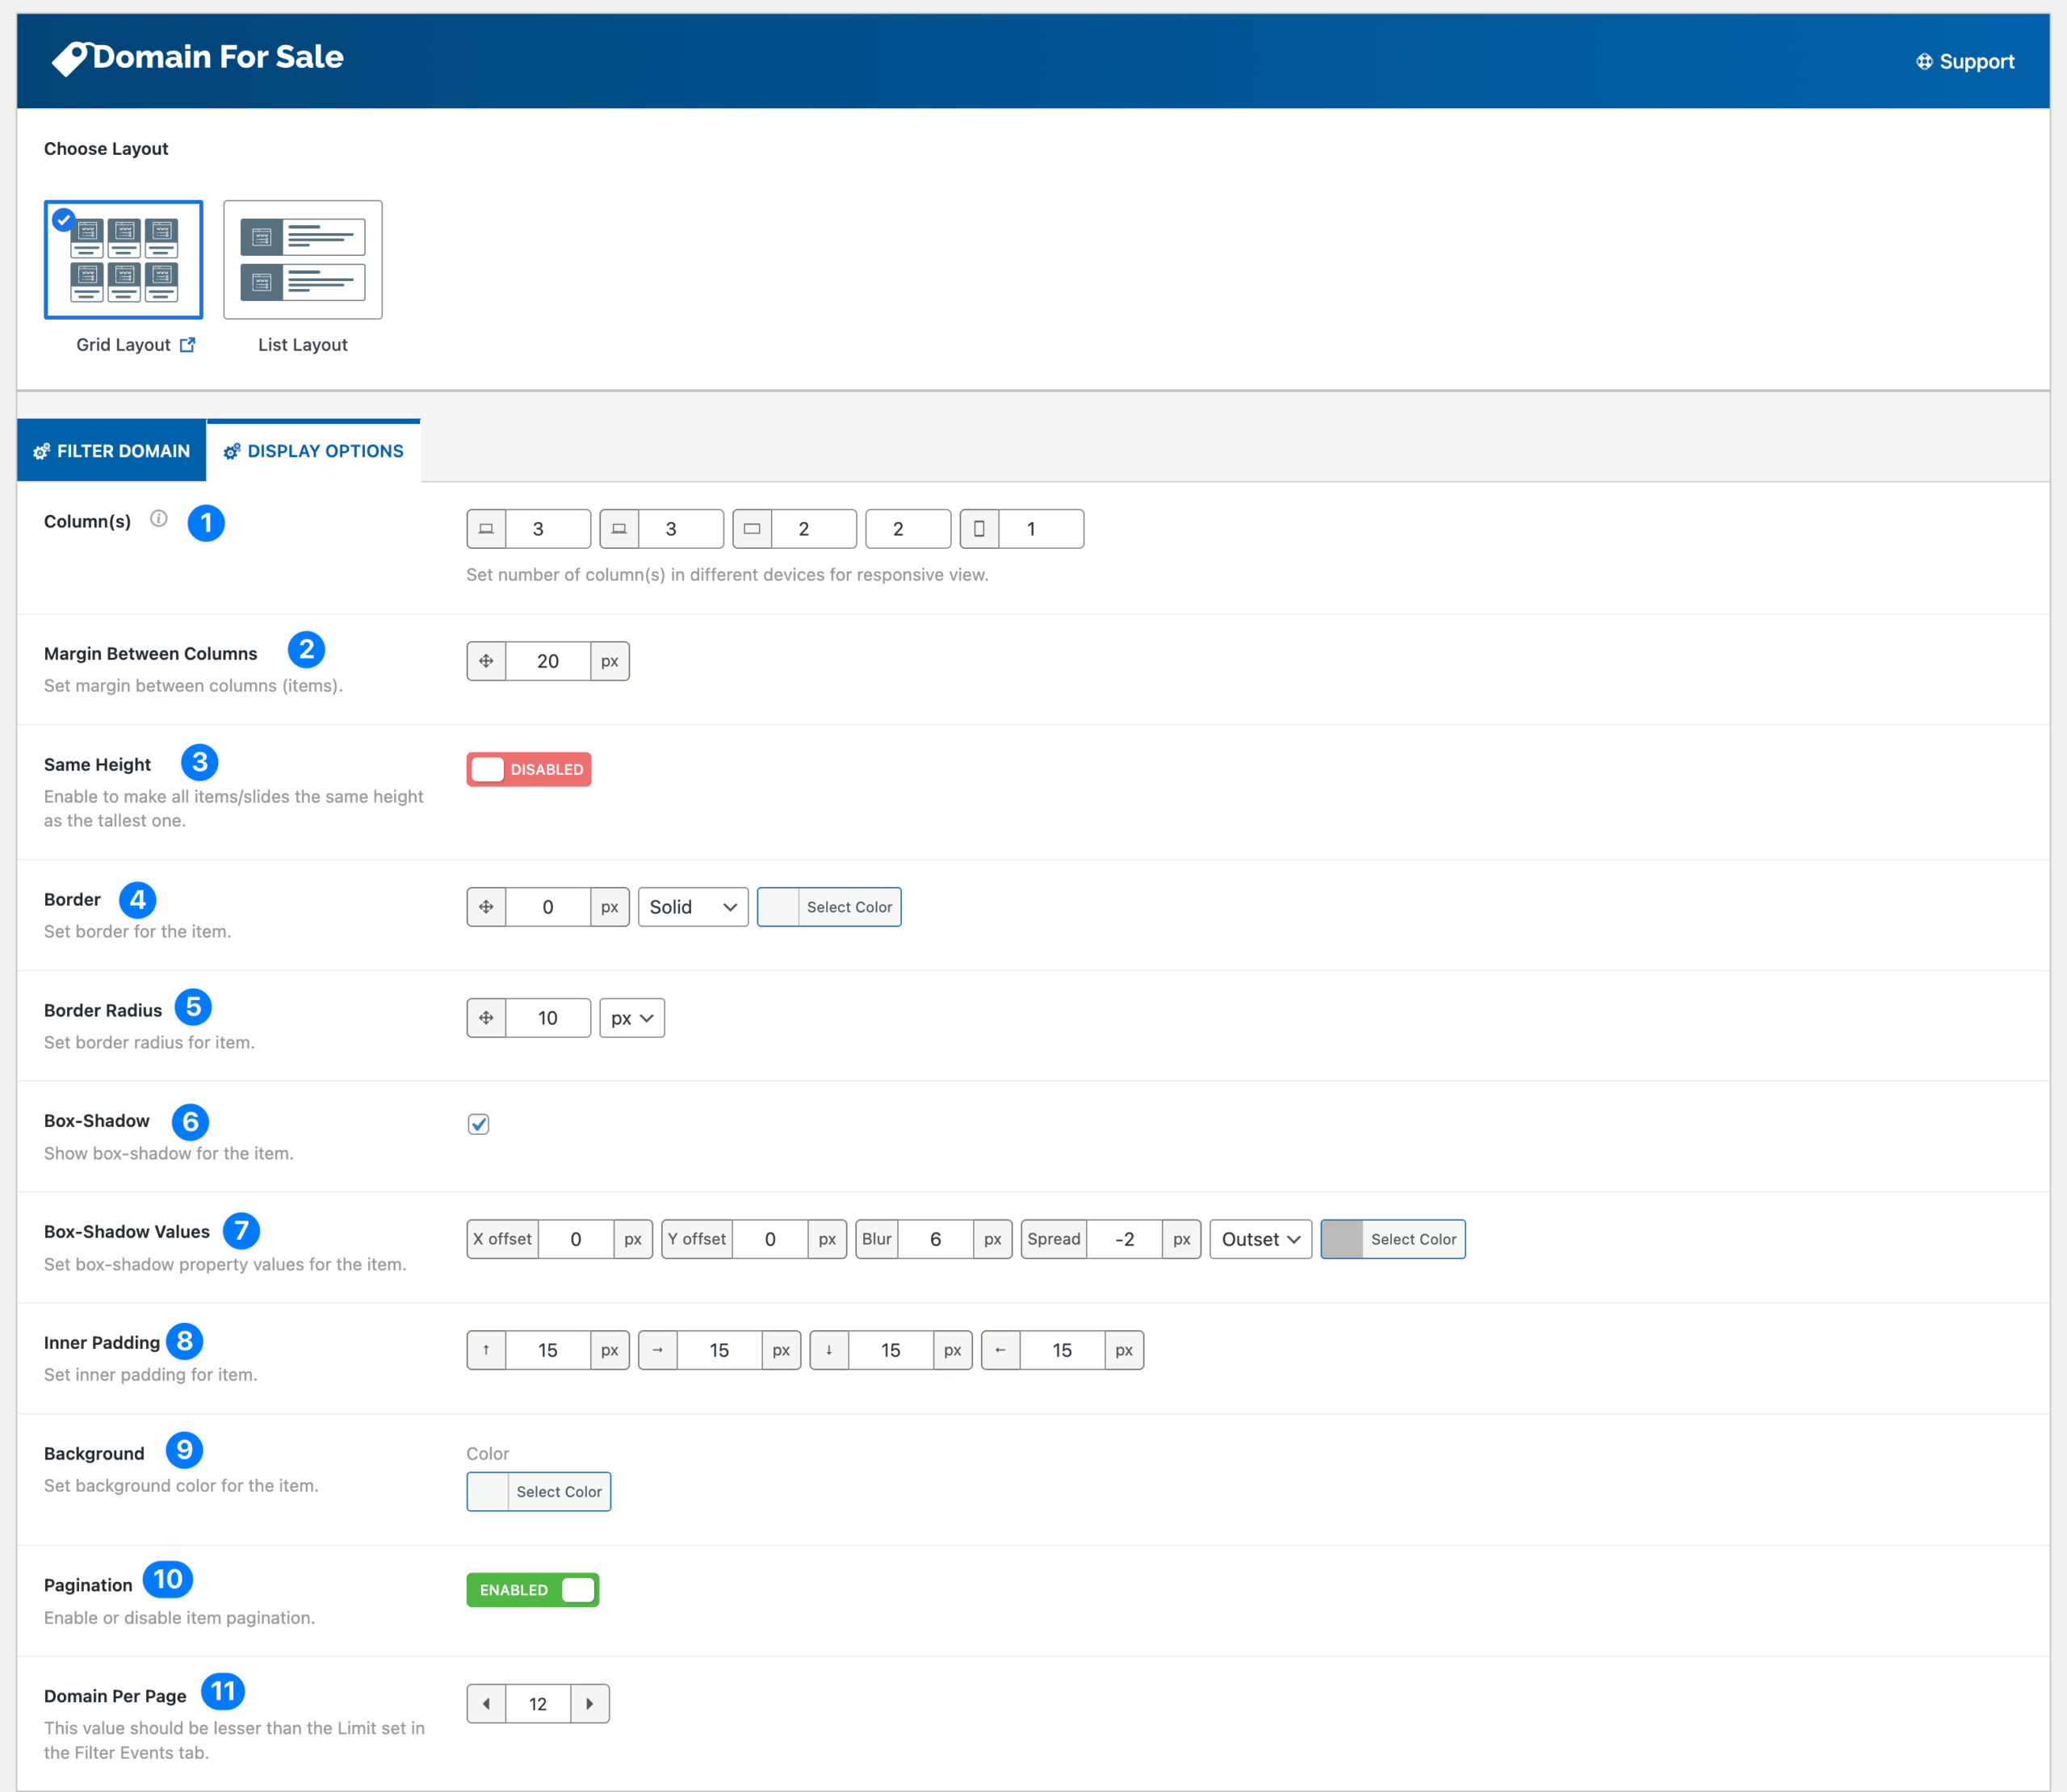
The Display Options tab allows you to customize the visual appearance of the domain listing.
1. Columns #
Set the number of columns for different screen sizes.
This ensures the layout remains responsive across devices.
Example configuration:
- Desktop → 3 columns
- Tablet → 2 columns
- Mobile → 1 column
2. Margin Between Columns #
Controls the spacing between domain items.
Example:
20px
3. Same Height #
Enable this option to make all listing items the same height.
This creates a cleaner grid layout when domain descriptions vary in length.
4. Border #
Configure the border around each domain item.
Options include:
- Border width
- Border style
- Border color
5. Border Radius #
Controls the rounded corners of each domain item.
Example:
10px
6. Box Shadow #
Enable or disable a shadow around each item.
This can help make listings stand out visually.
7. Box Shadow Values #
Customize the shadow properties:
- X offset
- Y offset
- Blur
- Spread
- Shadow color
8. Inner Padding #
Controls spacing inside each listing item.
Example:
15px
This improves readability of domain content.
9. Background #
Choose the background color for each domain item.
This allows you to match the listing style with your website design.
10. Pagination #
Enable pagination to split large domain lists into multiple pages.
This improves performance and user experience when displaying many domains.
11. Domain Per Page #
Set how many domains should appear on each page when pagination is enabled.
Example:
12
⚠ This value should be less than the Limit value defined in the Filter Domain tab.
Displaying the Domain Listing #
After creating the listing, a shortcode will be generated automatically.
Example shortcode:
[domain_listing id="62"]
Insert this shortcode into:
- Pages
- Posts
- Widgets
- Page builders (Elementor, Gutenberg, etc.)
This will display your configured domain listing on the frontend.


