This guide walks you through the essential steps to get Domain For Sale Pro up and running — from installation to publishing your first domain sale page.
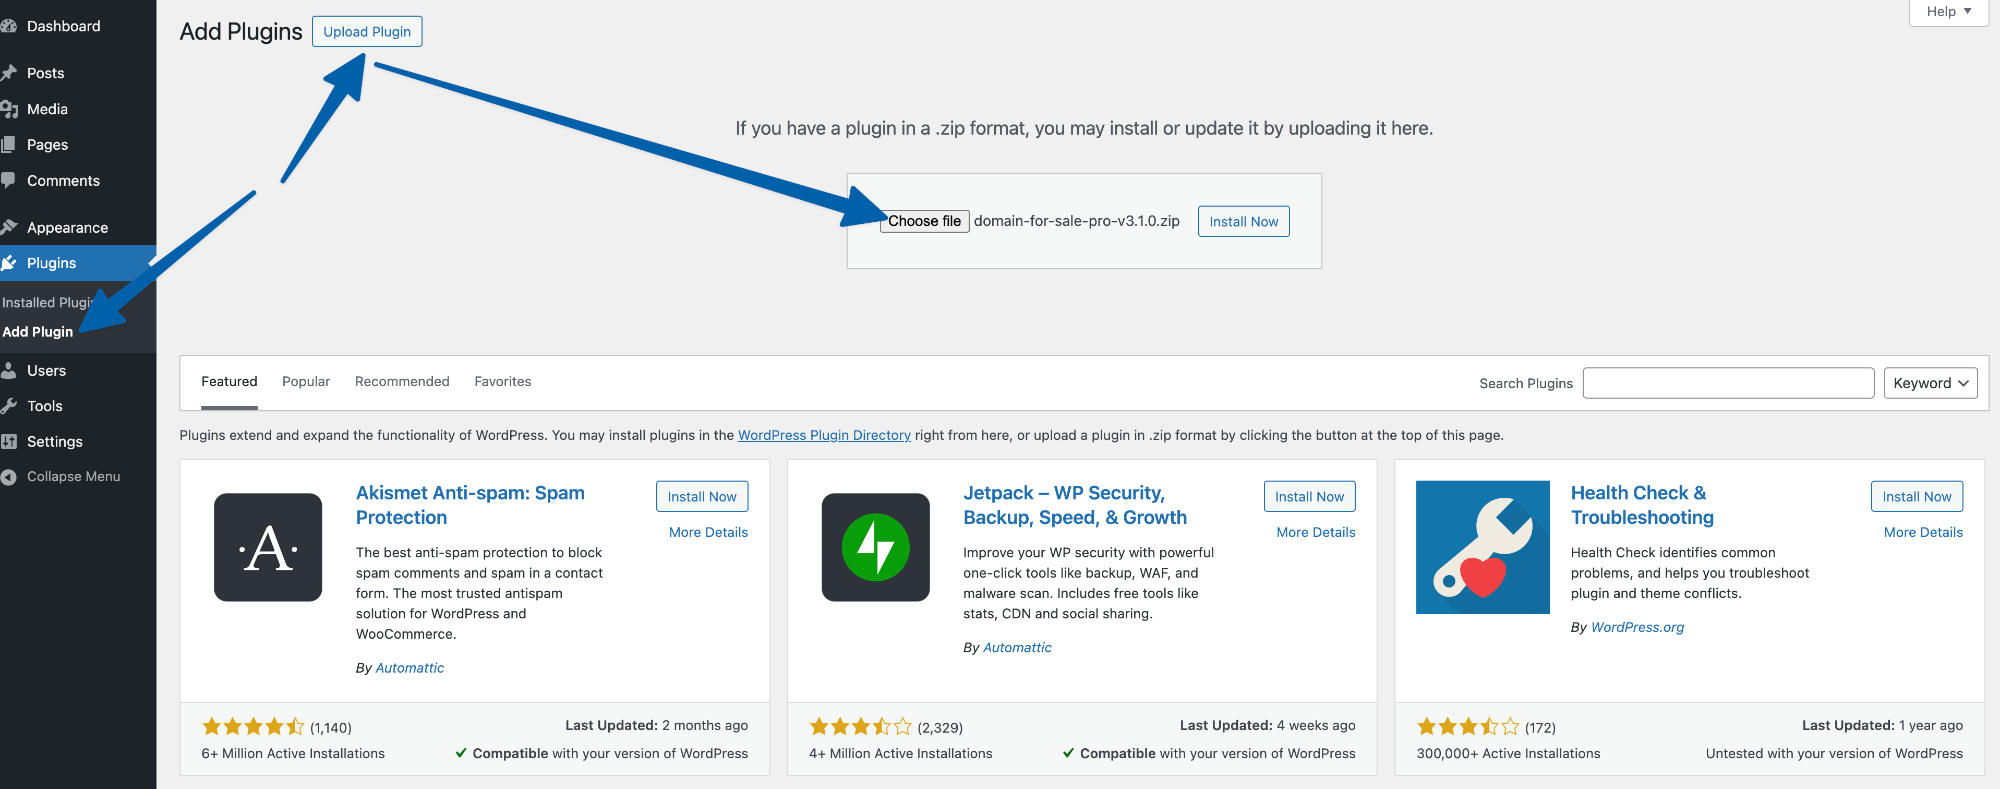
1. Installation #
- After purchasing Domain For Sale Pro, download the plugin file
domain-for-sale-pro.zipfrom your ThemeAtelier Account. - Log in to your WordPress Admin Dashboard.
- Navigate to Plugins → Add New → Upload Plugin.
- Click Upload Plugin, select the
domain-for-sale-pro.zipfile, and click Install Now. - Once installed, click Activate Plugin.
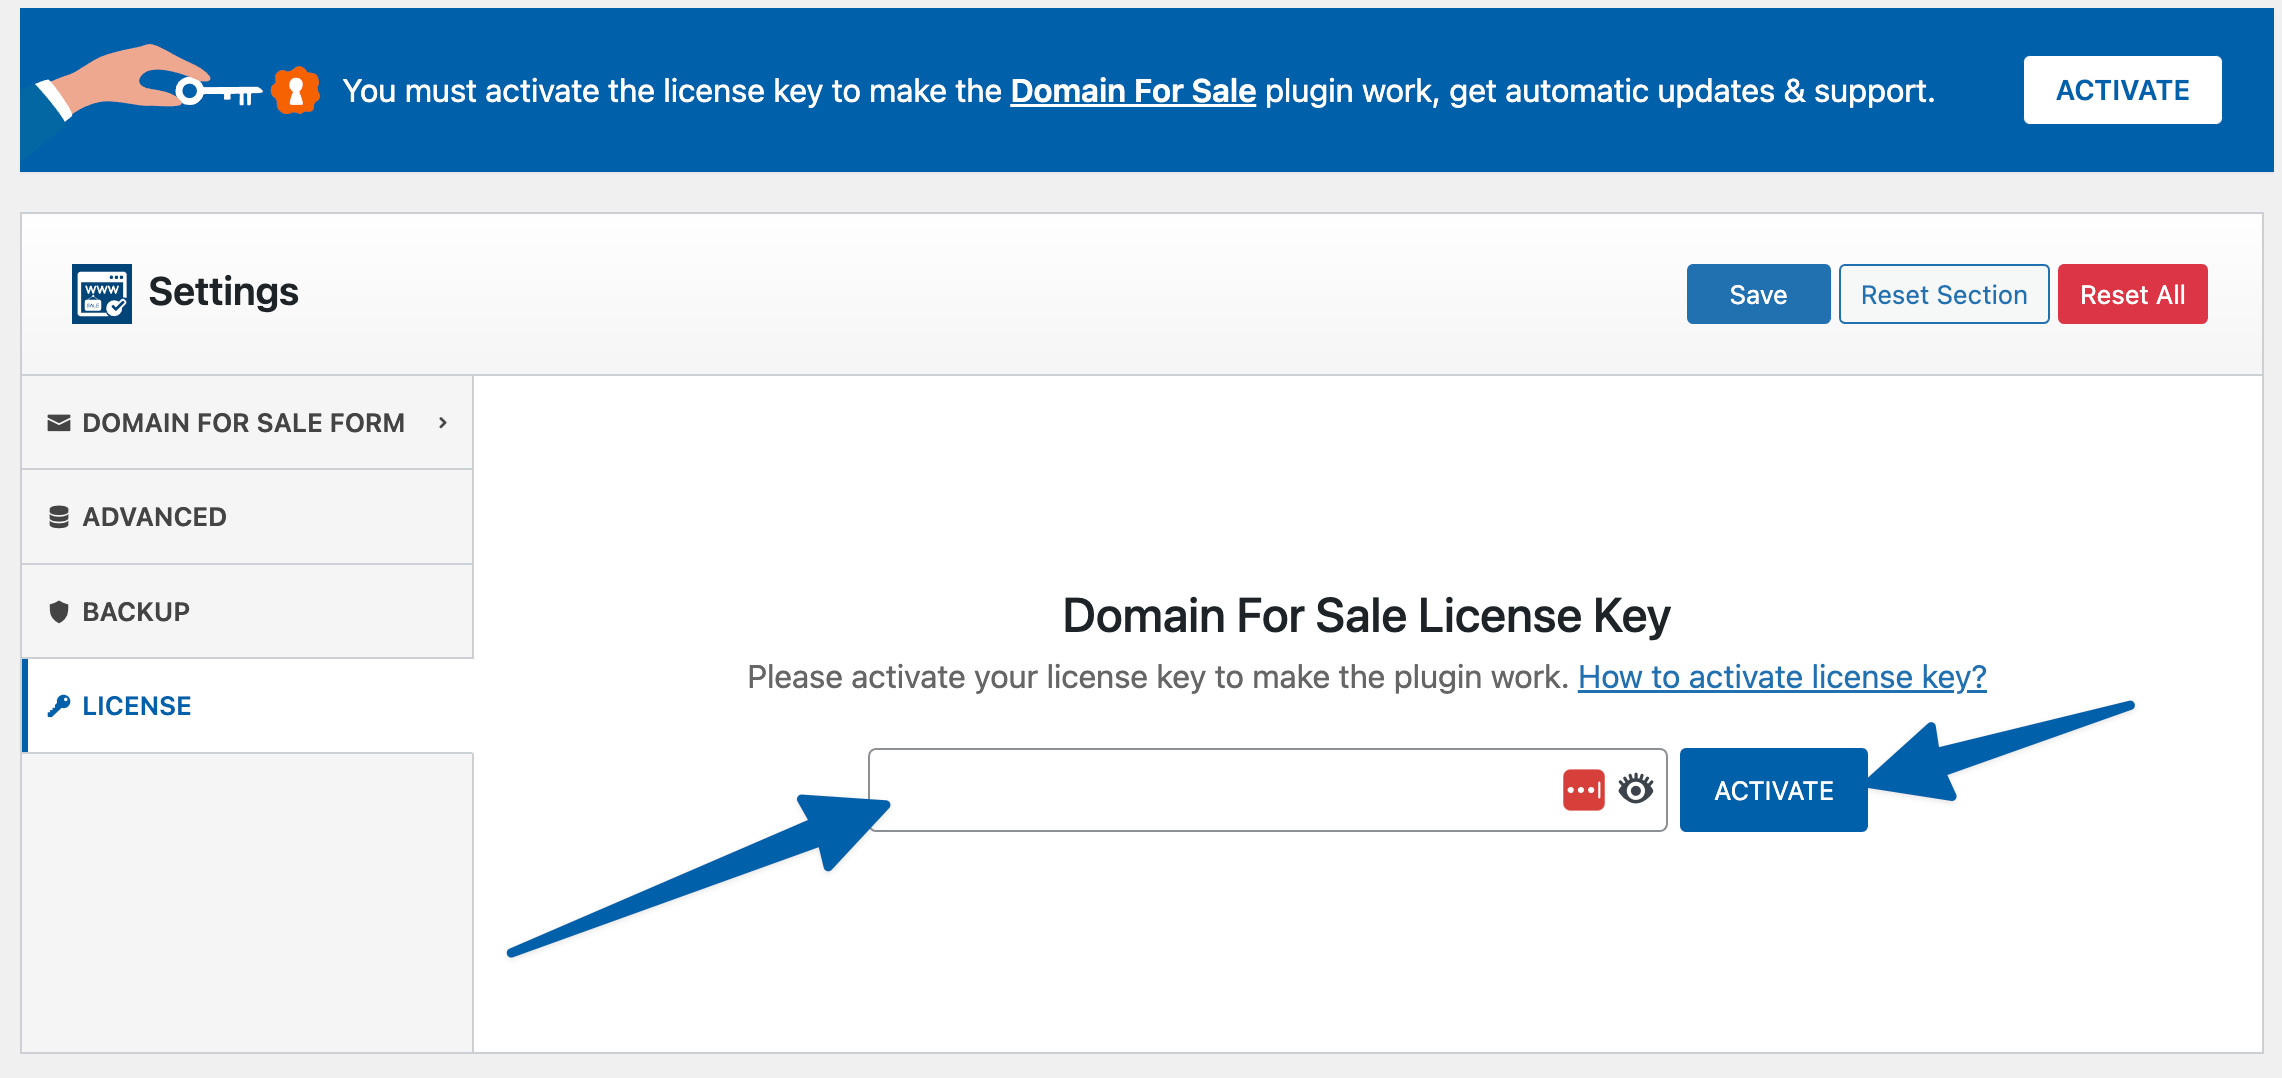
2. License Key Activation #
- After activation, you will be redirected to the License Activation page.
- Copy your license key from your purchase email or ThemeAtelier Account.
- Paste the key into the License Key field and click Activate.
- Once activated, you’ll start receiving automatic updates and premium support.
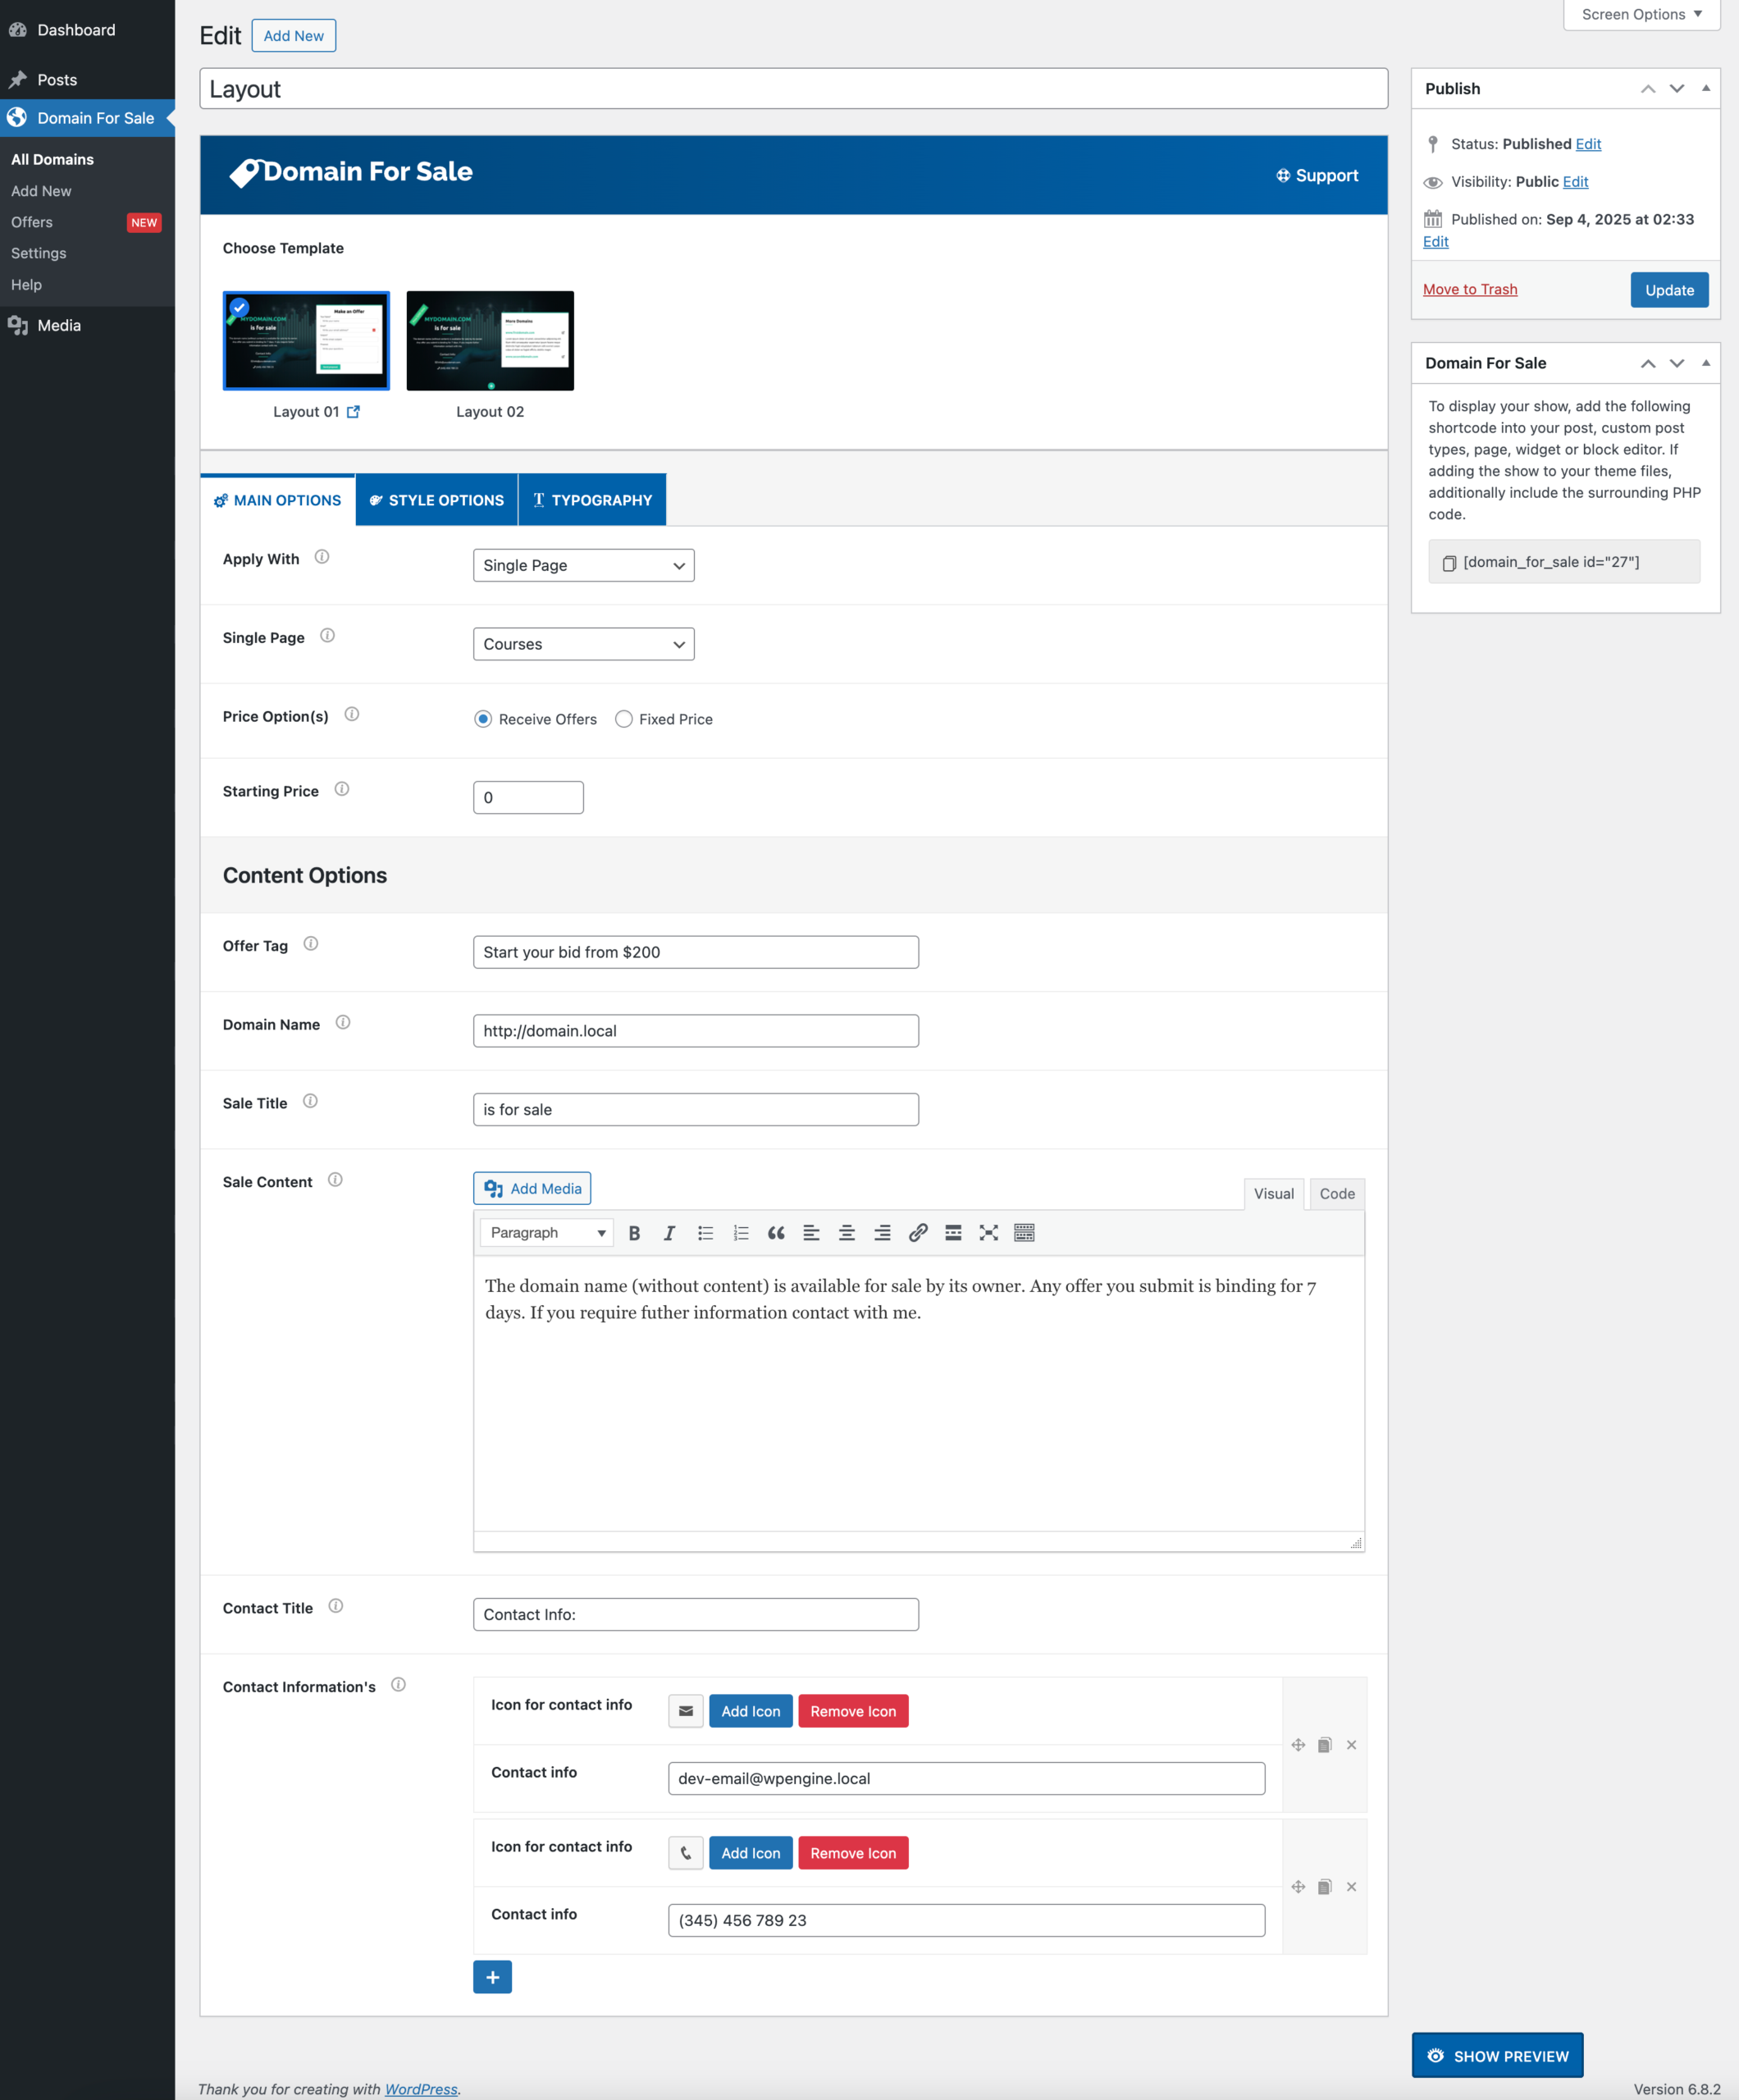
3. Your First Domain Template #
When the plugin is activated, a default template (Layout 01) is automatically created. You can edit this template or create a new one to list your domain for sale.
- Go to Domain For Sale → All Domains → Add New.
- Choose a template layout (e.g., Layout 01 or Layout 02).
- Configure the Main Options:
- Apply With – Decide how to display your domain sales page:
- Shortcode – Embed on any post/page.
- Replace Theme – Use it as a full-page replacement. Your current site and theme will be replaced with this template.
- Single Page – Display the template on a single page.
- Multi Pages – Apply to multiple pages.
- Price Option(s) – Select Receive Offers or Fixed Price.
- Starting Price – Add your base price or minimum bid.
- Content Options – Customize your offer tag, domain name, and sale title.
- Apply With – Decide how to display your domain sales page:
- Click Update to save.
- Use the provided shortcode (e.g.,
) to insert your domain sale template anywhere on your site.