
Introduction
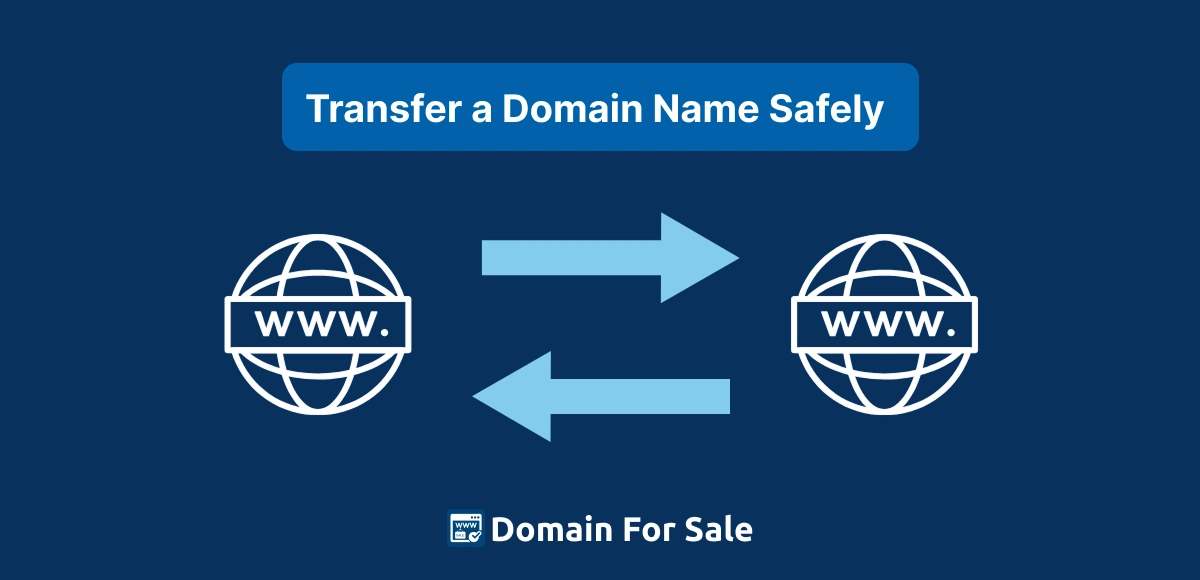
Transferring a domain name might sound simple — but if done carelessly, it can damage years of SEO progress in just a few days. From losing backlinks to temporary ranking drops, even small mistakes during a domain transfer can disrupt your website’s visibility and traffic.
Search engines treat a domain transfer as a major signal change. If your redirects, DNS, or tracking aren’t handled properly, Google may temporarily devalue your pages or misplace your backlinks. This can result in a sudden dip in rankings, organic clicks, and even customer trust.
The good news? With careful planning, you can transfer a domain name safely and preserve all your SEO value. In this guide, we’ll walk you through 7 proven steps to transfer a domain name safely in 2026 — without losing your hard-earned rankings, backlinks, or momentum.
Table of Contents
Why Domain Transfer Affects SEO
A domain transfer isn’t just a technical change—it’s a signal to search engines that your website’s location and ownership may have changed. Behind the scenes, several systems are impacted, including DNS, backlinks, and Google’s index. If these aren’t managed properly, your site can temporarily lose visibility in search results.
What Happens Behind the Scenes During a Transfer
When you transfer a domain name safely, your registrar, DNS records, and hosting provider all exchange data. If there’s even a short period of downtime or mismatched DNS propagation, Google’s crawlers might struggle to reach your site. This can delay indexing or, worse, cause Google to think your site has disappeared.
Temporary Indexing Issues and Redirect Confusion
Search engines rely on consistent signals—especially URLs—to maintain rankings. If old URLs aren’t properly redirected (using 301 redirects), search engines may view the new domain as unrelated. This often leads to temporary ranking drops, duplicate indexing, or even lost backlinks.
To avoid this, plan your redirects carefully before initiating the transfer. Keep both domains live until Google confirms the new one is fully indexed.
How Google Handles Domain Moves and Ranking Signals
Google treats a properly executed domain transfer as a “site move.” When 301 redirects and Google Search Console updates are in place, ranking signals like backlinks, domain authority, and trust typically transfer smoothly. However, without those measures, Google may reset or partially lose those signals.
💡 Pro Tip: Use Google Search Console’s “Change of Address” tool immediately after the transfer. It helps Google understand that your website has moved permanently and ensures your SEO strength transfers along with it.
Step 1 – Prepare Your Domain and Website for Transfer
Before you even start the technical process, the foundation of a safe and successful domain transfer is preparation. Skipping this stage is one of the most common reasons people lose rankings, backlinks, or even ownership access.
✅ Check Ownership, WHOIS Info & Domain Lock Status
First, verify that you’re the legal owner of the domain. Log in to your registrar account and review the WHOIS details to make sure your name, organization, and contact email are accurate. If the domain is registered under an old company or developer’s name, update it before initiating the transfer.
Next, check that your domain lock (transfer lock) is enabled. This prevents unauthorized transfers while you prepare. You’ll unlock it later when you’re ready to move the domain.
💾 Back Up Your Entire Website (Files + Database)
A complete backup is your insurance policy. Download all website files, databases, and configurations from your hosting provider or through a backup plugin. In case of unexpected downtime or file loss, you’ll be able to restore your site instantly—keeping your SEO and uptime intact.
⚠️ Confirm the Domain Isn’t Blacklisted or Penalized
Transferring a domain that’s been flagged by search engines or email blacklists can harm your site’s reputation. Use tools like Google Transparency Report or MXToolbox to ensure your domain has a clean history. If you’re acquiring a domain from another owner, also check its backlink profile on Ahrefs or Moz for spam links or penalties.
💡 Pro Tip: If you plan to sell or showcase the domain later, you can display verified ownership and trust signals using the Domain For Sale plugin. It helps build credibility and keeps inquiries secure during and after the transfer.
Step 2 – Choose a Reliable Domain Registrar
One of the easiest ways to transfer a domain name safely is to work with a registrar that’s secure, transparent, and trusted by major domain marketplaces. Your registrar is the gatekeeper between your domain and the global DNS system—so choosing the wrong one can mean delays, data loss, or even failed transfers.
.
🌐 Importance of Using Trusted Registrars
Stick with reputable registrars such as GoDaddy, Namecheap, or Google Domains. These platforms follow ICANN transfer policies, offer reliable support, and provide built-in security features like two-factor authentication and WHOIS privacy protection.
Trusted registrars also make it easier to manage renewals, DNS settings, and contact verification—crucial details that keep your SEO stable throughout the move.
⚠️ Avoid Cheap or Unreliable Platforms
It may be tempting to use low-cost or lesser-known registrars, but many of them have outdated systems, limited support, or hidden transfer fees. Worse, some delay authorization codes (EPP/Auth) or impose manual reviews that can slow your transfer for weeks.
Saving a few dollars up front isn’t worth risking your SEO visibility or domain security.
🚀 How Registrar Reputation Impacts Transfer Speed and Safety
Reliable registrars process transfers within 5–7 days and keep your DNS records live during the process—ensuring no downtime that could hurt your rankings. They also notify both the sending and receiving accounts at every stage, giving you full transparency and control.
A strong registrar reputation means fewer transfer errors, faster approvals, and better protection of your domain’s authority and backlinks.
💡 Pro Tip: Once your transfer is complete, host a professional landing page with the Domain For Sale plugin. It allows you to showcase your domain safely and maintain credibility with potential buyers or partners.
Step 3 – Unlock Your Domain and Get the Authorization Code
Once you’ve chosen a trusted registrar, the next step to transfer a domain name safely is unlocking it and securing the authorization credentials needed to complete the move. This process verifies ownership and prevents unauthorized transfers.
🔑 What an EPP/Auth Code Is and Where to Find It
Every domain registered under ICANN is assigned an EPP (Extensible Provisioning Protocol) or authorization code—a unique key that allows you to transfer your domain between registrars. Think of it as a digital password for your domain.
You can usually find this code inside your current registrar’s Domain Management or Transfer Settings section. Some registrars email it to the administrative contact for extra security, while others display it once identity verification is complete.
✉️ Double-Check the Administrative Email for Confirmation
Before initiating the transfer, confirm that the admin email associated with your domain is active and accessible. Transfer approval links or verification codes are often sent there. If you’ve changed email providers or company domains, update this contact information first to avoid failed confirmations or delays.
🔒 Keep the Domain Locked Again After the Transfer Completes
Once the transfer is successful, immediately re-enable domain lock at your new registrar. This prevents anyone from requesting another transfer without your consent. A locked domain is protected from unauthorized moves, ensuring your SEO, backlinks, and brand identity stay secure long term.
💡 Pro Tip: If your goal is to sell or list your newly transferred domain, add a verified landing page with the Domain For Sale plugin. It helps you manage inquiries directly and signals to buyers that your ownership is confirmed and active.
Step 4 – Transfer the Domain Without Interrupting SEO
The most critical part of learning how to transfer a domain name safely is ensuring that your website never goes offline during the process. Even a few hours of downtime can lead to broken backlinks, lost crawl data, and temporary ranking drops.
🌐 Initiate the Transfer Only After Ensuring DNS Continuity
Before starting the transfer, make sure your DNS (Domain Name System) settings are fully up to date and backed up. Verify that your new registrar has identical name server records and DNS configurations. This ensures your website remains accessible while the domain is moving between registrars.
You can use tools like DNSChecker.org to monitor propagation and confirm that your records resolve correctly worldwide.
🖥️ Keep the Same Hosting and Content Live During the Process
Changing both your domain and hosting provider at the same time is one of the most common SEO mistakes. Keep your hosting account, website files, and URLs exactly the same while transferring the domain.
This continuity signals to Google that your content hasn’t changed, helping preserve ranking signals and backlinks.
🚫 Avoid Downtime — Google Bots Should See No Disruption
Search engines crawl your site constantly. If Googlebot encounters downtime or error pages during a transfer, it may temporarily de-index your content. To prevent this, schedule the transfer during low-traffic hours and avoid making other major changes (like redesigns or CMS updates).
💡 Pro Tip: Once your transfer is complete, update your DNS TTL (Time to Live) values to a lower number temporarily—this allows faster propagation if you need to make additional changes later.
💡 Bonus Tip: If your domain is also listed for sale, set up a “coming soon” or Domain For Sale landing page using the Domain For Sale plugin. It keeps visitors and bots engaged even during backend transitions, maintaining SEO trust.
Step 5 – Set Up 301 Redirects Properly
If there’s one step that can make or break your SEO during a domain transfer, it’s 301 redirects. To transfer a domain name safely, you must tell search engines and users that your old URLs have permanently moved to a new location. This ensures your hard-earned rankings and backlinks continue working for you instead of vanishing into broken links.
🔁 Why 301 Redirects Preserve SEO Value and Backlinks
A 301 redirect tells Google that your page has permanently moved to a new URL. When configured correctly, Google transfers most of your old page’s authority, backlinks, and trust signals to the new domain. Without proper redirects, you risk losing both referral traffic and organic visibility overnight.
In short: no redirects = no SEO continuity.
⚙️ Step-by-Step: Redirecting Old Domain to New One
You can set up 301 redirects in several ways depending on your hosting provider or CMS:
For Apache servers (.htaccess method):
RewriteEngine On
RewriteCond %{HTTP_HOST} ^old-domain\.com [NC]
RewriteRule ^(.*)$ https://new-domain.com/$1 [L,R=301]
For NGINX servers:
server {
    server_name old-domain.com www.old-domain.com;
    return 301 https://new-domain.com$request_uri;
}
Alternatively, most registrars and managed WordPress hosts include simple redirect tools in their control panels. These can be safer for beginners who prefer not to edit server files.
🔍 Verify Redirects Are Working
After implementing redirects, use tools like Screaming Frog or Ahrefs to crawl your old URLs and confirm they correctly point to the new ones. Double-check that all variations—www vs. non-www, HTTP vs. HTTPS—redirect cleanly and return a 301 status, not 302 or 404 errors.
💡 Pro Tip: Keep your old domain active for at least 6–12 months after redirection. This gives Google enough time to reindex and consolidate all ranking signals under the new domain.
💡 Bonus Tip: If you’re transitioning to a new brand or selling the old domain, set up a verified landing page using the Domain For Sale plugin. It helps you retain SEO value while monetizing your domain traffic.
Step 6 – Update Google Search Console and Analytics
Once your domain transfer and redirects are in place, the next step to transfer a domain name safely without losing SEO is to update your analytics and webmaster tools. This ensures Google properly understands your migration and continues tracking traffic under the new domain.
🔍 Add and Verify Your New Domain in Google Search Console
Start by logging into Google Search Console. Add your new domain as a new property and complete the verification process using DNS or HTML file upload.
Verification allows Google to recognize you as the legitimate owner of the new domain, which is crucial for maintaining ranking authority and link equity.
🔄 Use the “Change of Address” Tool to Notify Google
Once your redirects are active, use Google Search Console’s Change of Address tool. It formally notifies Google that your entire site has moved to a new domain. This tool speeds up the indexing process and helps preserve ranking signals, preventing confusion between your old and new URLs.
💡 Tip: Only use this tool after all 301 redirects are confirmed to be working correctly.
📈 Update Google Analytics Property URLs
Log into Google Analytics and update your property’s default URL to reflect the new domain name. This ensures accurate traffic tracking and attribution. If you’re using Google Tag Manager or any third-party integrations, update the URLs there as well to prevent broken event tracking or referral mismatches.
💡 Pro Tip: Keep both old and new properties active in Google Search Console for at least 3–6 months. This helps monitor crawl behavior, error reports, and keyword performance during the transition period.
💡 Bonus Tip: If your site also features domain listings or sales pages, the Domain For Sale plugin seamlessly integrates with your analytics setup—so you can continue tracking buyer visits, inquiries, and SEO performance across multiple domains.
Step 7 – Monitor Rankings, Traffic, and Backlinks
Even after you transfer a domain name safely, your work isn’t quite done. The final step is continuous monitoring. Watching your SEO performance closely helps you catch small issues early—before they cost you traffic or authority.
📊 Use Analytics and SEO Tools to Track Performance
Keep a close eye on your metrics through Google Analytics, Ahrefs, or SEMrush.
Check that:
- Organic sessions and impressions remain stable.
- Your top pages still rank for their primary keywords.
- Crawl stats in Google Search Console show consistent activity.
These tools reveal whether your redirects, backlinks, and indexing signals successfully carried over when you transferred your domain name.
⚖️ Expect Minor Ranking Fluctuations
It’s completely normal to see short-term ranking drops after a transfer. Google needs a few weeks to re-evaluate your site and consolidate ranking signals.
Don’t panic—if your redirects and Search Console setup are correct, your SEO strength will rebound quickly. Consistency and patience are key to maintaining trust after you transfer a domain name safely.
🔗 Rebuild Any Lost Backlinks
Sometimes older backlinks don’t update automatically. Use Ahrefs or SEMrush to identify any broken or redirected links. Reach out to those site owners with your new URL, requesting an update.
Restoring even a handful of lost backlinks can accelerate the recovery of domain authority and organic visibility.
💡 Pro Tip: Keep detailed logs of your keyword rankings, traffic trends, and backlink gains for at least three months post-migration. This documentation helps you measure progress and verify that your domain transfer maintained its SEO integrity.
💡 Bonus Tip: If you manage multiple domains, monitor inquiries and landing-page traffic easily using the Domain For Sale plugin. It integrates seamlessly with analytics to give you insights across every domain you own.
Bonus Tips for Safe Domain Transfer
Now that you’ve learned how to transfer a domain name safely, here are a few extra precautions to make your transfer even more secure and SEO-friendly. These bonus tips help strengthen your domain authority, build user trust, and maintain professional credibility throughout the process.
🔒 Keep WHOIS Privacy Active During and After Transfer
Scammers and spammers often scrape WHOIS data for contact information. By keeping WHOIS privacy enabled, you hide sensitive ownership details such as your name, email, and address. This helps prevent phishing attempts or fake buyer inquiries during and after your domain transfer. Most major registrars like GoDaddy and Namecheap include WHOIS protection for free.
🕒 Renew the Domain for Multiple Years to Signal Trust to Google
Search engines like Google view long-term domain registrations as a sign of legitimacy and commitment. Renew your new domain for at least two to five years—it not only prevents accidental expiration but also sends a subtle trust signal that your website is stable and credible.
🔐 Use SSL Certificates to Avoid “Not Secure” Browser Warnings
After you transfer a domain name, install an SSL certificate (HTTPS) immediately. Modern browsers and search engines penalize non-secure websites, which can hurt user trust and rankings. Most hosts now offer free SSL via Let’s Encrypt or Cloudflare—make sure it’s enabled before your site goes live under the new domain.
💡 Use the Domain For Sale Plugin to Engage Visitors During Transfers
If your domain will be inactive or in transition, keep it professional with a branded landing page using the Domain For Sale plugin.
It helps you:
- Display verified ownership and trust badges.
- Capture buyer leads directly.
- Maintain SEO visibility instead of showing a blank or error page.
This not only protects your SEO presence but also turns a transitional period into a potential sales opportunity.
Common Mistakes to Avoid During Domain Transfer
Even with the best intentions, small errors can lead to lost rankings, broken links, or email disruptions. To transfer a domain name safely, it’s just as important to know what not to do. Avoid these common mistakes to ensure your migration stays smooth and SEO-friendly.
🚫 Forgetting to Set Up Redirects
Skipping 301 redirects is one of the biggest mistakes you can make during a domain transfer. Without them, search engines treat your new domain as an entirely different website, causing a loss of backlinks, referral traffic, and ranking authority.
Always implement redirects before launching the new domain, and double-check them using tools like Screaming Frog.
⚙️ Changing Hosting and Domain at the Same Time
It might seem efficient, but switching your hosting provider and domain simultaneously is risky. Doing both can cause downtime, DNS propagation delays, and confusion for Google’s crawlers.
Transfer your domain first, confirm stability, then handle hosting changes later. That’s how you transfer a domain name safely without interrupting your site’s availability.
📧 Ignoring Email Migrations
Your domain’s email addresses (like [email protected]) are tied to DNS and MX records. If you forget to migrate or update them, you could lose important messages. Always back up your emails and verify that your new registrar’s DNS setup includes accurate MX records.
🔍 Not Verifying New Domain Ownership with Google
After completing your domain transfer, verify ownership of your new domain in Google Search Console. This allows Google to track your site correctly, confirm redirects, and transfer ranking signals faster. Without verification, you risk temporary visibility loss in search results.
💡 Pro Tip: Once your migration is complete, use the Domain For Sale plugin to set up a professional landing page or redirect notice. It maintains user trust and keeps your domain active—even during transition periods.
Final Thoughts
Transferring a domain name isn’t just a technical task—it’s a strategic move that affects your brand, SEO, and digital reputation. To transfer a domain name safely, you need careful planning, consistent monitoring, and proper verification every step of the way.
A smooth transfer ensures that your hard-earned SEO rankings, backlinks, and user trust remain intact. Whether you’re moving a site, upgrading your brand, or selling a domain, following best practices gives buyers confidence and keeps your online presence strong.
FAQs About Transferring Domains Without Losing SEO
Will my SEO rankings drop after transferring a domain?
Minor ranking fluctuations are normal when you transfer a domain name safely, but they usually recover within a few weeks. Using 301 redirects, updating Google Search Console, and keeping your hosting stable ensures that most of your SEO value transfers smoothly.
How long does a domain transfer usually take?
Most domain transfers take 5–7 days, depending on your registrar and whether both parties approve the process promptly. Some transfers complete within 24–48 hours if no verification delays occur.
What’s the safest way to redirect old URLs?
Always use 301 redirects to tell Google your pages have permanently moved. You can configure them through your .htaccess file, DNS manager, or registrar dashboard. This helps preserve backlinks and ensures your old URLs pass link equity to your new domain.
Do I need to update backlinks after transferring a domain?
It’s a good idea to reach out to site owners linking to your old domain and request updates to the new one. Even though 301 redirects carry most of the SEO power, direct backlinks to your new domain strengthen authority faster and eliminate redirect chains.
How can I protect my domain during the transfer process?
Keep WHOIS privacy active, use two-factor authentication, and make sure your domain lock remains enabled until you initiate the transfer. If you’re showcasing your domains for sale, use the Domain For Sale plugin to handle inquiries securely and display verified ownership details.
🔐 Transfer or Sell Your Domains Securely with the Domain For Sale Plugin
The Domain For Sale plugin lets you create secure, verified landing pages for each of your domains. Easily manage inquiries, display pricing, and maintain SEO value even while transferring or selling.